PROJET AUTOBLOG


blog.fevrierdorian.com

source: blog.fevrierdorian.com

⇐ retour index

Picker une couleur a l’extérieur de l'interface Maya 2011 (Qt)

jeudi 28 mars 2013 à 20:13

maya_color_picker_tn.pngUn billet "ultra express"! :marioCours:

Depuis Maya 2011 et son passage à Qt, le picker de couleur a été modifié et il n'est plus possible de picker une couleur en dehors de l'interface Maya.

En fait si, et c'est tout con a faire! :hehe:

Il suffit, une fois le picker sélectionné, de cliquer dans l'interface Maya mais de garder le bouton gauche enfoncé et de glisser à l’extérieur de l'interface pour récupérer la couleur qui vous intéresse.

J'avoue, je n'ai pas trouvé ça tout seul. :baffed:

Geometry voxelization using Maya Python API (English Translation)

samedi 16 mars 2013 à 13:47

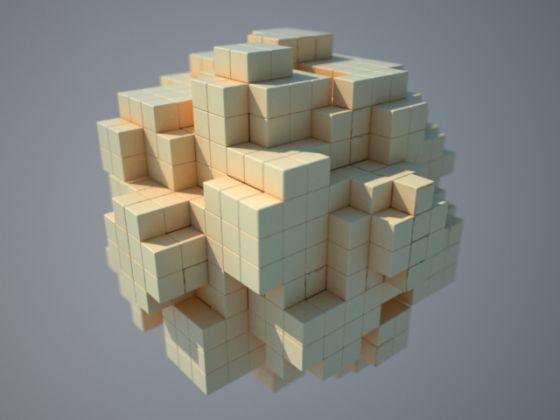
voxel_vray_tn.pngYet another little script only aimed to use the Maya API. :sauteJoie:

The idea is to reproduce the voxel geometric effect you may have already seen.

Nothing too serious and it probably already exists and maybe faster. To be honest, I did not even look. The goal is again to use the API. :baffed:

Principe

Before we begin, know that this problem is a textbook case. There are a thousands of ways to solve it and each method has these pro and con. :reflechi:

The method chosen here is simple: For each vertex of the geometry, we find the position "in cube unit" and generates a cube.

The only dificulty with this implementation is, once the vertex position recovered, to know where must be the center of the cube. :seSentCon:

voxel_vray.png

The code

import maya.cmds as cmds
import maya.OpenMaya as OpenMaya
 
voxelStep = 1.0
 
sel = OpenMaya.MSelectionList()
dagPath = OpenMaya.MDagPath()
 
sel.add("pSphere1")
sel.getDagPath(0, dagPath)
 
inMesh = OpenMaya.MFnMesh( dagPath )
pointArray = OpenMaya.MPointArray()
inMesh.getPoints(pointArray, OpenMaya.MSpace.kWorld)
 
grpName = cmds.group(empty=True)
 
voxelIdList = list()
 
for i in xrange(pointArray.length()) :
 
	cubePosX = round(pointArray[i].x/voxelStep)*voxelStep
	cubePosY = round(pointArray[i].y/voxelStep)*voxelStep
	cubePosZ = round(pointArray[i].z/voxelStep)*voxelStep
 
	cubeId = "%s%s%s" % (cubePosX, cubePosY, cubePosZ)
 
	if cubeId in voxelIdList :
		continue
	else :
		voxelIdList.append(cubeId)
 
	myCube = cmds.polyCube(width=voxelStep, height=voxelStep,  depth=voxelStep)[0]
	cmds.polyBevel(myCube, offset=0.02)
	cmds.parent(myCube, grpName)
	cmds.setAttr(myCube+".translate", cubePosX, cubePosY, cubePosZ)

Explainations

sel = OpenMaya.MSelectionList()

Basically, a MSelectionList is a list of MObject.

I never really understood what the term "selection" meant in this context as it actually does not "select" anything. :bete:

The particularity of a MSelectionList is to retrieve the MObject of a Maya node from its name, what we will do later.

dagPath = OpenMaya.MDagPath()

It is always difficult to explain to begginers what is a DAG and a DAG path. :gne:

As a large summary:

Many Maya API functions require DAG path to work.

For example, you can't retrieve world space coordinates of shape node's vertices if you don't know the path by which you get there. Two instances have only one shape node but it is indeed two different DAG path and world space coordinates of one vertex can have two possible values depending "from where we go".

sel.add("pSphere1")
sel.getDagPath(0, dagPath)

We add the Maya object "pSphere1" in the MSelectionList and we retrieve its DAG path (zero is the index in the list).

So we've "converted" "pSphere1" (that doesn't mean anything in Maya API) in true MObject.

inMesh = OpenMaya.MFnMesh( dagPath )

By default, all what you get from the API are MObjects. In general, we check the MObject type using MObject.apiType() or MObject.hasFn().

But here we assume the user provide a mesh. :siffle:

The MFnMesh class allow you to deal with a "true" programming object from which we will be able to get informations. It's a function set.

I invite you to read the documentation to understand the how and why of function sets.

So we have a _inMesh_ that we will use to retrieve mesh's vertices.

pointArray = OpenMaya.MPointArray()
inMesh.getPoints(pointArray, OpenMaya.MSpace.kWorld)

The first line creates a MPointArray to store our mesh vertices positions.

And the second line fills the array with vertices coordinates world space (position relative to the center of the scene, not the center of the object itself).

grpName = cmds.group(empty=True)

Here we only create an empty group that will store cubes we will create later. It is just more convenient to delete a group with everything in it than select all the cubes manually. :dentcasse:

voxelIdList = list()

We create a list which will be used to store identifiers (or keys) of areas where cubes have already been generated. I return below.

cubePosX = round(pointArray[i].x/voxelStep)*voxelStep
cubePosY = round(pointArray[i].y/voxelStep)*voxelStep
cubePosZ = round(pointArray[i].z/voxelStep)*voxelStep

And here are the small lines that does everything. You'll see, it is very simple.

So, what are we trying to do with this?

Let's suppose the desired size cubes is 2.0.

It comes across a vertex set with a X value of 10.2. Of course, we will not put our cube in the center of the vertex (10.2). We would not get the desired effect at all. :nannan:

We need the exact position of the cube. We must "count the number of cube."

How do I know what is the 10.2 distance in cube size 2.0? By simply: 10.2/2.0 = 5.1.

As we cann't have 5.1 cubes, we round using the round() function. In the case of round(5.1), we have 5 (5.7 would give 6).

So now we know that if we create a cube of size 2.0, you should move it 5 times its size to make it emcompass the vertex. We then multiply the rounded value (5) by the size of a cube (2) to obtain a new position: The position of the cube, not wedged on the vertex but keyed to the voxel grid.

And voila! Now you know! :laClasse:

We did this for the three axes.

cubeId = "%s%s%s" % (cubePosX, cubePosY, cubePosZ)
 
if cubeId in voxelIdList :
	continue
else :
	voxelIdList.append(cubeId)

Here, we create a "hash" (a string) of the cube position and we store it in a list. That way, if we fall on a vertex which, once rounded, is in the same places than an already existing cube, it does not create it (no duplicates! :hehe:).

Although method seems a little very odd (convert vertex positions to string), I felt it was the easiest way to manage a unknown sized grid without too many lines of code.

But if you have another one short and quick to implement, don't hesitate to share. : D

myCube = cmds.polyCube(width=voxelStep, height=voxelStep,  depth=voxelStep)[0]
cmds.polyBevel(myCube, offset=0.02)
cmds.parent(myCube, grpName)
cmds.setAttr(myCube+".translate", cubePosX, cubePosY, cubePosZ)

After all of this, everything is simple:

And start again for another vertex!

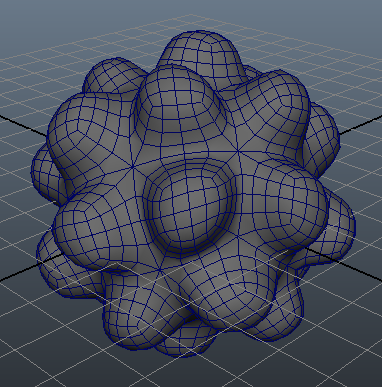
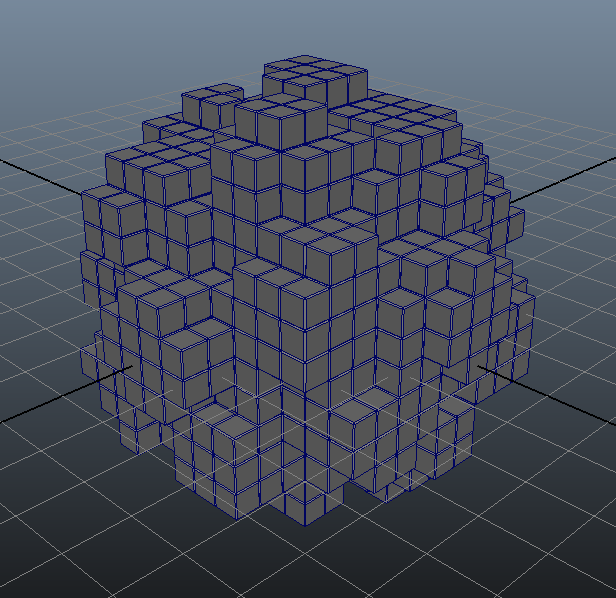
voxel_maya_api_001.png

voxel_maya_api_002.png

Again: This script is not optimized at all, it is a rough prototype for training purpose, not a production tool. Just give it a heavy mesh to realize. :mechantCrash:

Conclusion

This express ticket is over.

As you see, principle is quite simple. Well, once again we could have done this differently and probably more effective (try with MFnMesh.allIntersections).

Personally, playing with the Maya API always amuses me so much. :)

See you!

:marioCours:

EDIT 2013/03/17

I couldn't resist to try MFnMesh.allIntersections(). There is a well more optimized version (with acceleration structure MFnMesh.autoUniformGridParams()).

The main difference between the previous one and this one is we don't go through each vertex anymore but we project rays through a grid instead (X, Y, Z).

The second difference is the code work on a animated mesh (1 to 24 here). You should test, the effect is cool. :)

import maya.cmds as cmds
import maya.OpenMaya as OpenMaya
 
startFrame = 1
endFrame = 24
 
voxelSize = 20.0
voxelStep = 0.5
 
sel = OpenMaya.MSelectionList()
dagPath = OpenMaya.MDagPath()
 
sel.add("pSphere1")
sel.getDagPath(0, dagPath)
 
inMesh = OpenMaya.MFnMesh( dagPath )
 
grpReelNames = dict()
for curTime in xrange(startFrame, endFrame+1) :
	grpName = "frameGrp_%s".zfill(4) % int(curTime)
	grpReelName = cmds.group(name=grpName, empty=True)
	cmds.setKeyframe(grpReelName+".visibility", value=0.0, time=[curTime-0.1])
	cmds.setKeyframe(grpReelName+".visibility", value=1.0, time=[curTime])
	cmds.setKeyframe(grpReelName+".visibility", value=0.0, time=[curTime+1])
	grpReelNames[curTime] = grpReelName
 
for grpReelName in grpReelNames :
	if cmds.objExists(grpReelName) :
		cmds.delete(grpReelName)
 
for curTime in xrange(startFrame, endFrame+1) :
 
	cmds.currentTime(curTime)
 
	voxelIdList = list()
 
	#I use while just because xrange with floats is impossible
	i = -voxelSize/2.0
	while i <= voxelSize/2.0 :
 
		j = -voxelSize/2.0
		while j <= voxelSize/2.0 :
			for axis in ["zSide", "ySide", "xSide"] :
				z = 0
				y = 0
				x = 0
				zOffset = 0
				zDir = 0
				yOffset = 0
				yDir = 0
				xOffset = 0
				xDir = 0
				if axis == "zSide" :
					x = i
					y = j
					zOffset = 10000
					zDir = -1
				elif axis == "ySide" :
					x = i
					z = j
					yOffset = 10000
					yDir = -1
				elif axis == "xSide" :
					y = i
					z = j
					xOffset = 10000
					xDir = -1
 
				raySource = OpenMaya.MFloatPoint( x+xOffset, y+yOffset, z+zOffset )
				rayDirection = OpenMaya.MFloatVector(xDir, yDir, zDir)
				faceIds=None
				triIds=None
				idsSorted=False
				space=OpenMaya.MSpace.kWorld
				maxParam=99999999
				testBothDirections=False
				accelParams=inMesh.autoUniformGridParams()
				sortHits=False
				hitPoints = OpenMaya.MFloatPointArray()
				hitRayParam=None
				hitFacePtr = None#OpenMaya.MScriptUtil().asIntPtr()
				hitTriangle=None
				hitBary1=None
				hitBary2=None
 
				hit = inMesh.allIntersections(raySource,
								rayDirection,
								faceIds,
								triIds,
								idsSorted,
								space,
								maxParam,
								testBothDirections,
								accelParams,
								sortHits,
								hitPoints,
								hitRayParam,
								hitFacePtr,
								hitTriangle,
								hitBary1,
								hitBary2)
				if not hit :
					continue
 
				# for each interestected points
				for k in xrange(hitPoints.length()) :
 
					cubePosX = round(hitPoints[k].x/voxelStep)*voxelStep
					cubePosY = round(hitPoints[k].y/voxelStep)*voxelStep
					cubePosZ = round(hitPoints[k].z/voxelStep)*voxelStep
 
					cubeId = "%s%s%s" % (cubePosX, cubePosY, cubePosZ)
 
					if cubeId in voxelIdList :
						continue
					else :
						voxelIdList.append(cubeId)
 
					myCube = cmds.polyCube(width=voxelStep, height=voxelStep,  depth=voxelStep)[0]
					cmds.polyBevel(myCube, offset=0.02)
					cmds.parent(myCube, grpReelNames[curTime])
					cmds.setAttr(myCube+".translate", cubePosX, cubePosY, cubePosZ)
			j += voxelStep
		i += voxelStep
Sorry for the horizontal code. :dentcasse:

I don't explain this version because I think if you understood the previous one, you shouldn't have too much problems with this one. :gniarkgniark:

EDIT 2013/03/19

Justin Israel caught my attention about my voxelIdList. I've learn something so I share his message with you:

If you are using it as a lookup for the hash of previously seen items, using a list is going to be progressively slower and slower over time as the list grows, because doing "x in list" is O(n) complexity. You might want to use a set():

voxelIdSet = set()
...
if cubeId in voxelIdSet :
    continue
else:
    voxelIdSet.add(cubeId)

A set is O(1) complexity, so doing "x in set" will instantly find the item by its hash, as opposed to have to scan the entire list looking for an equality match.

Voxelisation polygonale via l'API Python Maya

samedi 16 mars 2013 à 12:04

voxel_vray_tn.pngEt encore un petit script prétexte à utilisation de l'API Maya. :sauteJoie:

L’idée est de reproduire l'effet de géométrie en voxel que vous avez peut être déjà observe.

Rien de bien méchant et ça existe surement déjà et en plus rapide. Pour tout vous dire, je n'ai même pas cherché. Le but est encore une fois d'utiliser l'API. :baffed:

Principe

Avant de commencez, sachez que ce problème est un cas d’école. Il y a mille et une façons de le résoudre, chaque méthode ayant ces avantages et ces inconvénients. :reflechi:

La méthode choisi ici est la plus simple: Pour chaque vertex de la géométrie, on trouve la position "arrondi au cube près" et on génère un cube.

La seule difficulté de cette implémentation est, une fois la position du vertex récupéré, de savoir ou doit être le centre du cube. :seSentCon:

voxel_vray.png

Le code

import maya.cmds as cmds
import maya.OpenMaya as OpenMaya
 
voxelStep = 1.0
 
sel = OpenMaya.MSelectionList()
dagPath = OpenMaya.MDagPath()
 
sel.add("pSphere1")
sel.getDagPath(0, dagPath)
 
inMesh = OpenMaya.MFnMesh( dagPath )
pointArray = OpenMaya.MPointArray()
inMesh.getPoints(pointArray, OpenMaya.MSpace.kWorld)
 
grpName = cmds.group(empty=True)
 
voxelIdList = list()
 
for i in xrange(pointArray.length()) :
 
	cubePosX = round(pointArray[i].x/voxelStep)*voxelStep
	cubePosY = round(pointArray[i].y/voxelStep)*voxelStep
	cubePosZ = round(pointArray[i].z/voxelStep)*voxelStep
 
	cubeId = "%s%s%s" % (cubePosX, cubePosY, cubePosZ)
 
	if cubeId in voxelIdList :
		continue
	else :
		voxelIdList.append(cubeId)
 
	myCube = cmds.polyCube(width=voxelStep, height=voxelStep,  depth=voxelStep)[0]
	cmds.polyBevel(myCube, offset=0.02)
	cmds.parent(myCube, grpName)
	cmds.setAttr(myCube+".translate", cubePosX, cubePosY, cubePosZ)

Les explications

sel = OpenMaya.MSelectionList()

Fondamentalement, une MSelectionList est une liste de MObject.

Je n'ai jamais vraiment compris ce que la notion de "sélection" voulait dire avec cet objet car il ne "sélectionne" rien. :bete:

La particularité d'une MSelectionList c'est de pouvoir récupérer le MObject d'un node Maya depuis son nom, ce qu'on fait plus loin.

dagPath = OpenMaya.MDagPath()

C'est toujours assez difficile d'expliquer ce qu'est le DAG de Maya et encore plus un DAG path. :gne:

Pour faire un gros résumé:

Beaucoup de fonctions de l'API Maya nécessitent un DAG path pour pouvoir fonctionner.

Par exemple, on ne peut récupérer les coordonnées dans l'espace des vertices d'un node de shape si on ne connait pas le chemin par lequel on y arrive. Deux instances ont un seul node de shape mais il s'agit bien de deux DAG path différents et les coordonnes dans l’espace du même vertex auront deux valeurs possibles suivant "par ou on passe".

sel.add("pSphere1")
sel.getDagPath(0, dagPath)

On ajoute l'object Maya "pSphere1" dans la MSelectionList et on récupère son DAG path (le zéro étant l'index dans la liste de sélection).

Nous avons donc "converti" "pSphere1" (qui ne veut rien dire en API Maya) en vrai MObject.

inMesh = OpenMaya.MFnMesh( dagPath )

Par défaut, tout ce qu'on récupère dans l'API ce sont des MObjects. En général, on vérifie le type du MObject via un MObject.apiType() ou MObject.hasFn()

Mais là on part du principe que le user a bien donné une mesh. :siffle:

La fonction MFnMesh permet d'avoir à disposition un "vrai" objet (en terme programmation j'entend) sur lequel on va pouvoir agir pour récupérer des informations. C'est un function set.

Je vous invite a lire la documentation afin de comprendre le comment du pourquoi des function sets.

Nous avons donc un object _inMesh_ qui va nous servir a récupérer les vertices de notre mesh.

pointArray = OpenMaya.MPointArray()
inMesh.getPoints(pointArray, OpenMaya.MSpace.kWorld)

La première ligne créée un tableau de point MPointArray pour accueillir les positions des vertices de notre mesh.

Et la second ligne remplit le tableau avec les coordonne des vertices en espace monde (position par rapport au centre de la scène, non par rapport au centre de l'objet lui même).

grpName = cmds.group(empty=True)

Ici on ne fait que créer un groupe vide qui accueillera les cubes que nous allons créer par la suite. C'est juste qu'il est plus pratique de supprimer un groupe avec tout dedans que de sélectionner tous les cubes à la pogne. :dentcasse:

voxelIdList = list()

On créé une liste qui servira a stocker les identifiant (ou code) des zones ou les cubes on déjà été générés. J'y reviens plus bas.

cubePosX = round(pointArray[i].x/voxelStep)*voxelStep
cubePosY = round(pointArray[i].y/voxelStep)*voxelStep
cubePosZ = round(pointArray[i].z/voxelStep)*voxelStep

Et voici la petite ligne qui fait tout. Vous allez voir, elle est très simple.

Alors, qu'est ce qu'on cherche à faire avec ça?

On va partir du principe que la taille voulue des cubes fait 2.0.

On tombe sur un vertex positionné en X à 10.2. Bien entendu, on ne va pas placer notre cube au centre du vertex (à 10.2). On n'obtiendrais pas du tout l'effet voulu. :nannan:

Il nous faut la position exacte du cube. Il faut "comptez en nombre de cube".

Comment savoir à quoi correspond la distance 10.2 en cube de taille 2.0? En faisant tout simplement: 10.2/2.0. Soit 5.1.

Comme on ne peut pas avoir 5.1 cubes, on arrondi via la fonction round(). Dans le cas de round(5.1), on obtient 5 (5.7 aurait donne 6).

On sait donc maintenant que si on crée un cube de taille 2.0, il faut le déplacer de 5 fois sa taille pour qu'il englobe le vertex. On multiplie donc la valeur arrondi (5) par la taille d'un cube (2) pour obtenir une nouvelle position: La position du cube, non plus calée sur le vertex mais calée sur la grille du voxel.

Et voila, vous avez capté! :laClasse:

On fait ça pour les trois axes.

cubeId = "%s%s%s" % (cubePosX, cubePosY, cubePosZ)
 
if cubeId in voxelIdList :
	continue
else :
	voxelIdList.append(cubeId)

Ici, on créé une "signature" (en string) de la position du cube et on la stock dans une liste. Comme ça, si on retombe sur un vertex qui, une fois arrondi, se retrouve au même endroits qu'un cube déjà existant, on ne le crée pas (pas de doublons! :hehe:).

Bien que cette manière de faire semble un peu est très bizarre (convertir les positions des vertex en string), j'ai eu l'impression que c’était la méthode la plus simple pour gérer une grille dont on ne connait pas la taille sans trop de lignes de code.

Mais si vous en avez une autres assez rapide à mettre en place, n’hésitez pas. :D

myCube = cmds.polyCube(width=voxelStep, height=voxelStep,  depth=voxelStep)[0]
cmds.polyBevel(myCube, offset=0.02)
cmds.parent(myCube, grpName)
cmds.setAttr(myCube+".translate", cubePosX, cubePosY, cubePosZ)

Après c'est simple:

Et on repart pour un autre vertex!

voxel_maya_api_001.png

voxel_maya_api_002.png

Encore une fois: Ce script n'est pas optimisé du tout, c'est plus un prototype grossier qu'un outil de prod. Il suffit de lui donner un mesh un peu lourd pour s'en rendre compte. :mechantCrash:

Conclusion

Ainsi s’achève ce billet express.

Vous avez vue, c'est assez bête dans le principe. Bon, encore une fois on aurait pu faire différemment et surement plus efficace (essayez avec MFnMesh.allIntersections()).

Personnellement, jouer avec l'API Maya m'amuse toujours autant. :)

A bientôt!

:marioCours:

EDIT 2013/03/17

Je n'ai pas pu résister à l'appel de la méthode MFnMesh.allIntersections(). Voici donc une version bien plus optimisé que précédemment (avec structure d’accélération MFnMesh.autoUniformGridParams()).

La principale différence comparé au code précédent est qu'ici nous ne passons plus par chaque vertex mais nous envoyons des rayon sur trois grille (X, Y, Z).

La seconde différence est que ce code fonctionne sur un mesh animé (1 a 24 ici). Testez, l'effet est assez sympa. :)

import maya.cmds as cmds
import maya.OpenMaya as OpenMaya
 
startFrame = 1
endFrame = 24
 
voxelSize = 20.0
voxelStep = 0.5
 
sel = OpenMaya.MSelectionList()
dagPath = OpenMaya.MDagPath()
 
sel.add("pSphere1")
sel.getDagPath(0, dagPath)
 
inMesh = OpenMaya.MFnMesh( dagPath )
 
grpReelNames = dict()
for curTime in xrange(startFrame, endFrame+1) :
	grpName = "frameGrp_%s".zfill(4) % int(curTime)
	grpReelName = cmds.group(name=grpName, empty=True)
	cmds.setKeyframe(grpReelName+".visibility", value=0.0, time=[curTime-0.1])
	cmds.setKeyframe(grpReelName+".visibility", value=1.0, time=[curTime])
	cmds.setKeyframe(grpReelName+".visibility", value=0.0, time=[curTime+1])
	grpReelNames[curTime] = grpReelName
 
for grpReelName in grpReelNames :
	if cmds.objExists(grpReelName) :
		cmds.delete(grpReelName)
 
for curTime in xrange(startFrame, endFrame+1) :
 
	cmds.currentTime(curTime)
 
	voxelIdList = list()
 
	#I use while just because xrange with floats is impossible
	i = -voxelSize/2.0
	while i <= voxelSize/2.0 :
 
		j = -voxelSize/2.0
		while j <= voxelSize/2.0 :
			for axis in ["zSide", "ySide", "xSide"] :
				z = 0
				y = 0
				x = 0
				zOffset = 0
				zDir = 0
				yOffset = 0
				yDir = 0
				xOffset = 0
				xDir = 0
				if axis == "zSide" :
					x = i
					y = j
					zOffset = 10000
					zDir = -1
				elif axis == "ySide" :
					x = i
					z = j
					yOffset = 10000
					yDir = -1
				elif axis == "xSide" :
					y = i
					z = j
					xOffset = 10000
					xDir = -1
 
				raySource = OpenMaya.MFloatPoint( x+xOffset, y+yOffset, z+zOffset )
				rayDirection = OpenMaya.MFloatVector(xDir, yDir, zDir)
				faceIds=None
				triIds=None
				idsSorted=False
				space=OpenMaya.MSpace.kWorld
				maxParam=99999999
				testBothDirections=False
				accelParams=inMesh.autoUniformGridParams()
				sortHits=False
				hitPoints = OpenMaya.MFloatPointArray()
				hitRayParam=None
				hitFacePtr = None#OpenMaya.MScriptUtil().asIntPtr()
				hitTriangle=None
				hitBary1=None
				hitBary2=None
 
				hit = inMesh.allIntersections(raySource,
								rayDirection,
								faceIds,
								triIds,
								idsSorted,
								space,
								maxParam,
								testBothDirections,
								accelParams,
								sortHits,
								hitPoints,
								hitRayParam,
								hitFacePtr,
								hitTriangle,
								hitBary1,
								hitBary2)
				if not hit :
					continue
 
				# for each interestected points
				for k in xrange(hitPoints.length()) :
 
					cubePosX = round(hitPoints[k].x/voxelStep)*voxelStep
					cubePosY = round(hitPoints[k].y/voxelStep)*voxelStep
					cubePosZ = round(hitPoints[k].z/voxelStep)*voxelStep
 
					cubeId = "%s%s%s" % (cubePosX, cubePosY, cubePosZ)
 
					if cubeId in voxelIdList :
						continue
					else :
						voxelIdList.append(cubeId)
 
					myCube = cmds.polyCube(width=voxelStep, height=voxelStep,  depth=voxelStep)[0]
					cmds.polyBevel(myCube, offset=0.02)
					cmds.parent(myCube, grpReelNames[curTime])
					cmds.setAttr(myCube+".translate", cubePosX, cubePosY, cubePosZ)
			j += voxelStep
		i += voxelStep
Désolé pour le code horizontal. :dentcasse:

Je ne fais pas de commentaires supplémentaires car je pense que si vous avez compris le premier code, celui ci est tout aussi simple. :gniarkgniark:

EDIT 2013/03/19

Justin Israel a fait une remarque très pertinante concernant ma voxelIdList. J'ai appris un truc ducoup. Je vous traduis son message ici:

Si tu utilise voxelIdList pour chercher la signature d'un cube déjà placé, le fait que ce soit une liste va progressivement ralentir la recherche au fil qu'elle se remplit, car x in list est de complexité O(n). Tu devrais utiliser un set():

voxelIdSet = set()
...
if cubeId in voxelIdSet :
    continue
else:
    voxelIdSet.add(cubeId)

Un type set est de complexité O(1) donc faire un x in set va instantanément trouver l'item depuis sa signature, à l'inverse d'une liste qu'une faut parcourir entièrement.
VRay User Attributes (English Translation)

dimanche 17 février 2013 à 22:33

user_attr_vray_tn.pngHere is a tutorial I wanted to do for quite some time. :dentcasse:

For a long time now, VRay can use per object attributes to control some values. It can go far but often, this values are used in shaders. The general idea is to apply a single and unique shader to a big number of object, but that each object had some "special" attributes with value in them that will be applied to the shader. If you remember, I presented (french) a similar feature for mental ray (User Data).

But before doing that, this tutorial will explain how to export/import vrmesh then redo shader assignments directly within the vrmesh! As you can see, we have a lot to do! :bravo:

vrmeshs (aka proxy)

What?

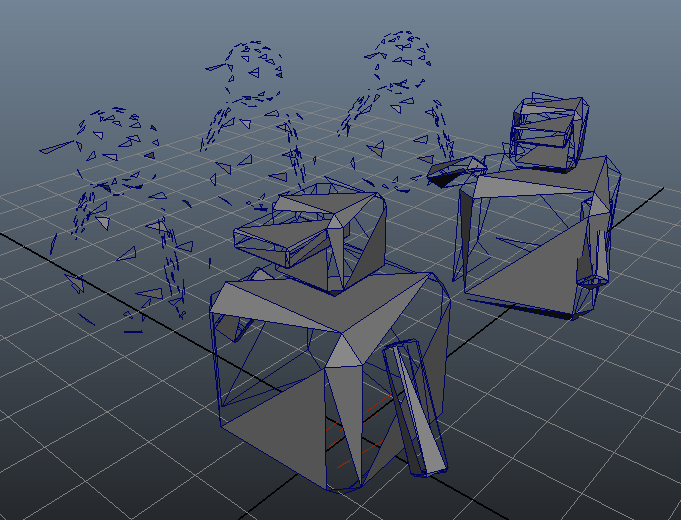
Briefly: You know the principle of texture tiling? (No? Hop! Hop! Hop! (french) :Nannan: ) Well, principle is the same, but for geometry: Vrmesh are "ready to raycast" meshes. Geometry is stored in a grid (voxel).

So you only load necessary "box" to render. Your vrmesh can be huge, only the elements necessary for the calculation will be loaded/unloaded on the fly. As well as tiled maps, this increase your disk IO but gives you great flexibility.

Don't be afraid because of the size, vrmesh are done for! :D

Practice

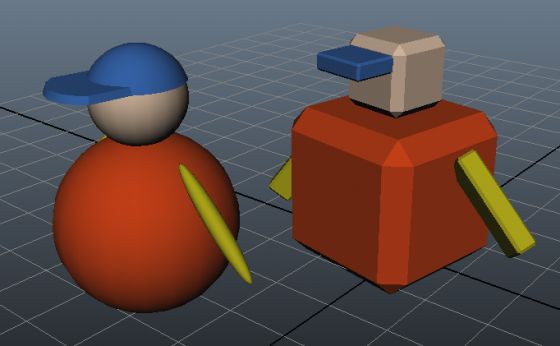
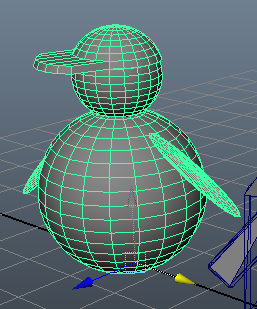
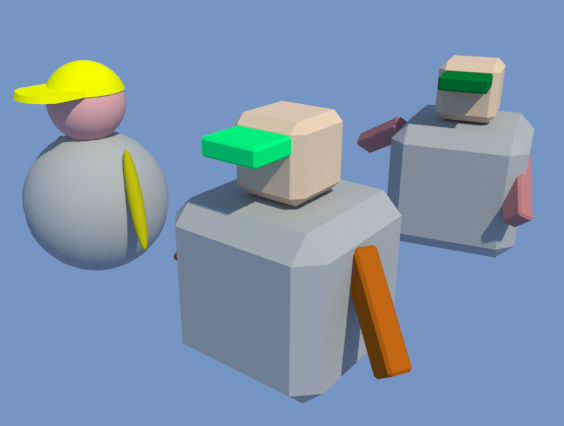
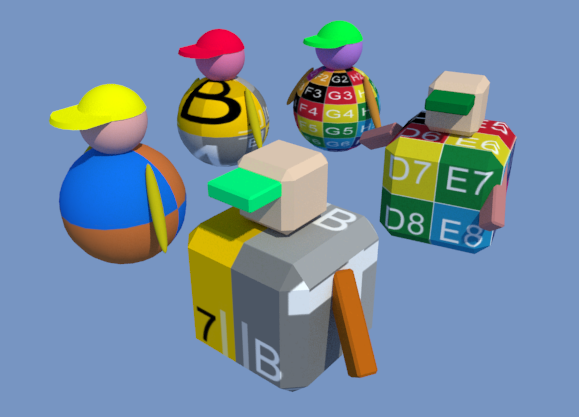
Let's do simple, here is a scene with to 24 frame animation cycles:

user_attr_vray_001.png

You can't see it but they are walking! :onSeFendLaPoire:

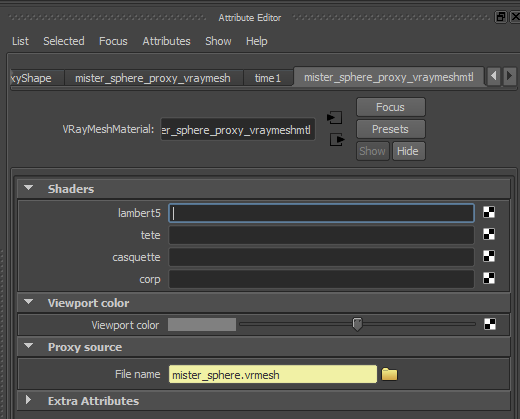
At this step, principle is to assign, to each "shader group", an ordinary shader (lambert is fine). Name is the importante part because it will be stored in the vrmesh with it assigned faces:

user_attr_vray_002.png

"lambert5" should have been "arms" but I've completely missed it. :baffed:

Even though this is not required, try to keep coherence in names between all your objects. So, if you have characters crowd to export. Assign them all shaders "arm", "corp", "head", "Hair", "tenuHaut", "tenuBas", etc ... With a bit of script, you will save time later.

Select mesh group you want to export:

user_attr_vray_003.png

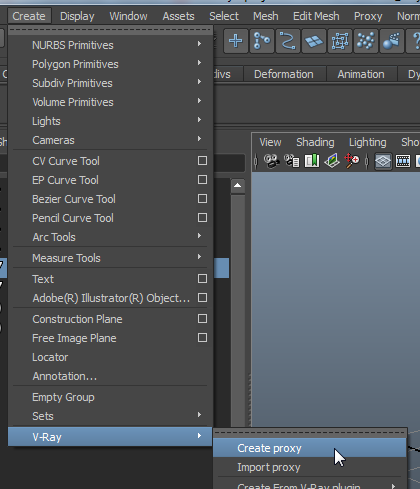
Then go in Create/V-Ray/Create proxy:

user_attr_vray_004.png

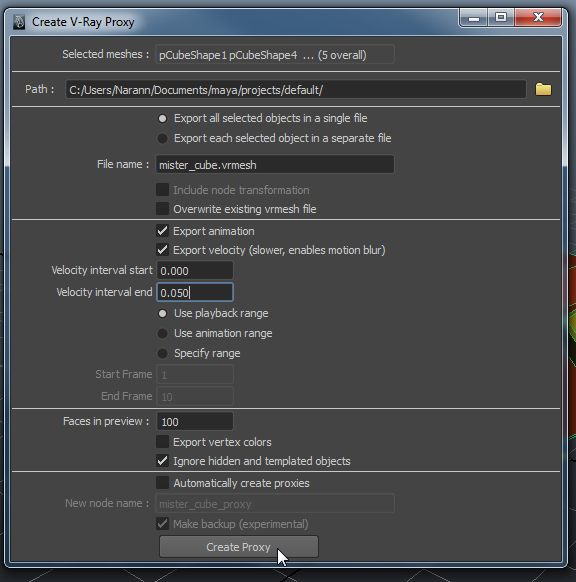
You will have a horrible quite sober interface:

user_attr_vray_005.png

Select Export animation. If your mesh is animated and you plan to use motion blur on your final render, select Export velocity. The two values will create the interval to calculate direction vectors to be stored in the vertices. VRay will calculate the motion blur geometry from this informations. Be careful on this interval. You can expect some (bad) surprises. If you don't go with motion blur, deselect this option. This will store less information in the geometry.

In my case I also select Use playback range but advise accordingly to your case. :reflechi:

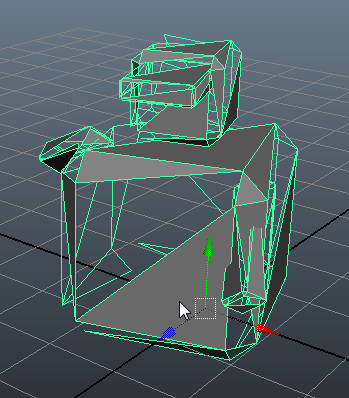
With Face in preview, Chaos Group provide us what look like a small and trivial feature but very interesting in practice: The idea is to save n face indices that will be displayed in the viewport later.

When doing proxy, mainly to lighten a scene, we often have to manage large bouding box. Depending on the pipeline, you may even have a proxy made by another department. Here, Chaos Group guys had a very interesting reflection: "Why not make a cool proxy corresponding to the real geometry?". The bet is entirely successful, you will see that later. :)

If you want to import directly the newly created proxy, you can select Automatically create proxies.

For the rest, I strongly advise you to read the documentation.

Once that's done, click on Create Proxy!

Proceed this steps for every characters you want to export.

:longBar:

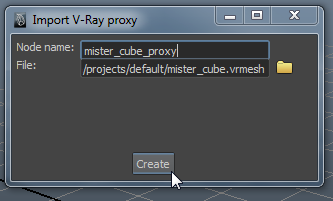
To import all this:

user_attr_vray_006.png

user_attr_vray_007.png

Tadaaaa:

user_attr_vray_008.png

user_attr_vray_009.png

And now our 100 faces per object. Slap it right? :aupoil:

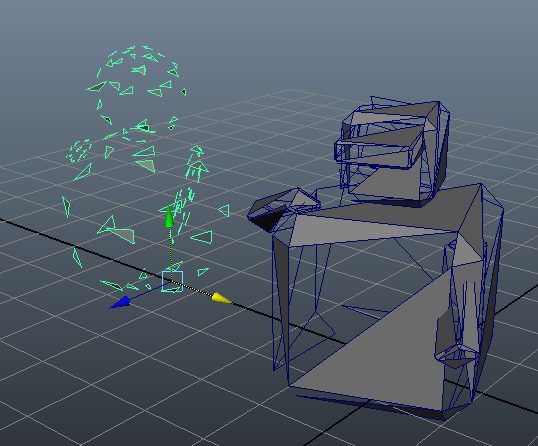
Seriously, you can import hundreds of them, your viewport does not flinch. In addition, these proxies correspond to the final model. This approximation should less bother you than a low model or worse, a bounding box.

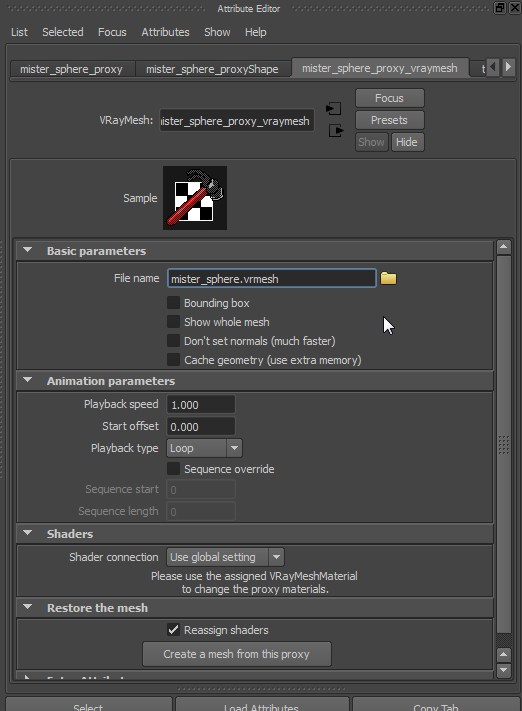
Now let's look at this options:

user_attr_vray_010.png

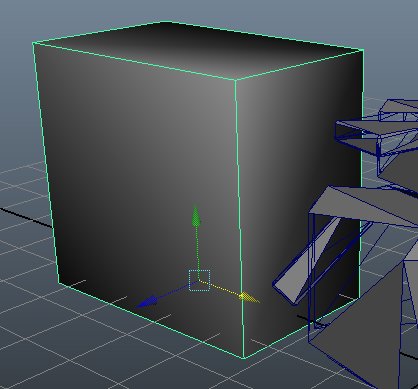
If we select Bounding box:

user_attr_vray_011.png

For nostalgic. :trollface:

If you are not satisfied with the approximation, Chaos Group has got you covered: Show whole mesh:

user_attr_vray_012.png

Other options are more specific. I will not go into detail. If you're interested: :RTFM:.

Just notice animation speed is customisable (anim is possible too! :gniarkgniark: ) and that in our case (and most cases) it's Loop.

Go tabs on the right. VRay has already connected a shader and...

user_attr_vray_013.png

Oh miracle! Our slots are there! :laClasse:

You will just have to drag and drop shaders to use.

Note that trying too hard to be nice, VRay create a shader for each imported vrmesh. But if you import twice the same vrmesh, you will have two similar shaders. Don't hesitate to remove one and apply a single shader for each vrmesh "source".

Now let's get serious! :enerve:

User Attributes

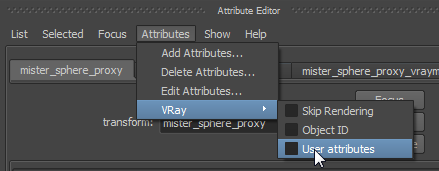
Select the transform node of one vrmesh you have and add User attributes:

user_attr_vray_014.png

In these User attributes (lost at the bottom of your Attribute Editor) add the following:

casquetteColor=1,1,0;

user_attr_vray_015.png

There, you should begin to understand. :siffle:

On the second, create a similar value:

user_attr_vray_016.png

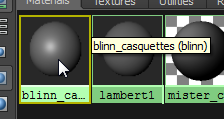
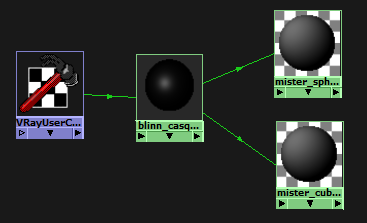
Now create a shader, a blinn in my example (Yes, I know it's bad). Give it a clear name (it will quickly become a mess in your connections so it's up to you :redface: ):

user_attr_vray_017.png

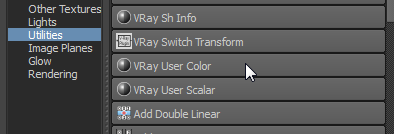
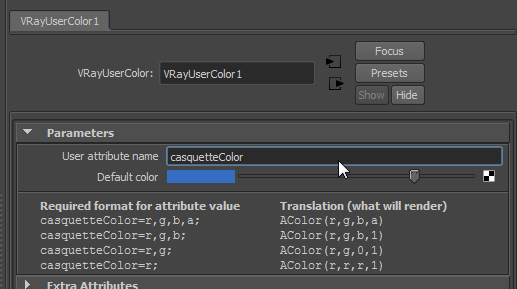
Add a VRayUserColor node then enter your attribute value:

user_attr_vray_018.png

user_attr_vray_019.png

Set the default color you want. It will be the color used if User Attribute is not present/valid.

You have some syntax examples just below the node (another good idea).

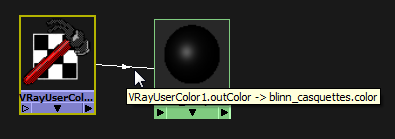
Connect this node to the color attribute of your shader (it's a shame the default color is not used in the hypershade, it would be a nicer than a black hole).

user_attr_vray_020.png

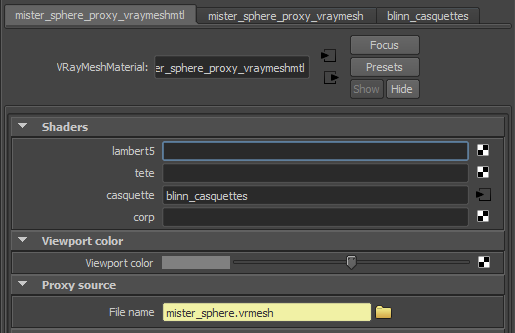
Connect your shader to both VRayMeshMaterial, in the "casquette" slot:

user_attr_vray_022.png

user_attr_vray_021.png

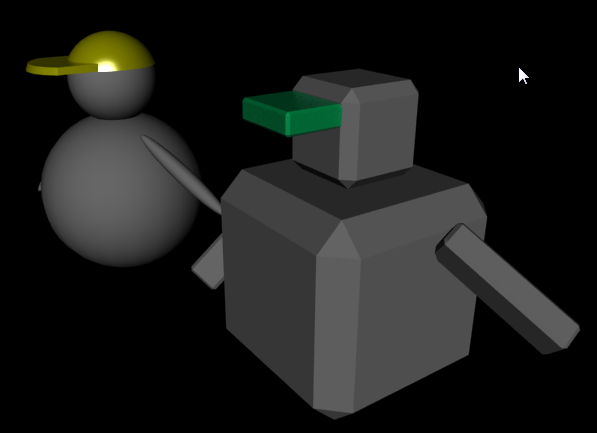
Then render:

user_attr_vray_023.png

Victory song (to listen with :smileFou: )

Do the same for all shaders (except "corp" that we keep for after :jdicajdirien: ):

user_attr_vray_024.png

user_attr_vray_025.png

Well, those are for colors. You can do the same with VRayUserScalar and floatting point value.

Now we start the body ("corp"):

user_attr_vray_026.png

Just a file node.

Supposing you have four textures:

The only variable in your texture is located at the end (and, why not, in the path).

Put this in your file path:

user_attr_vray_027.png

Then apply this variable to your different User Attributes:

user_attr_vray_028.png

user_attr_vray_029.png

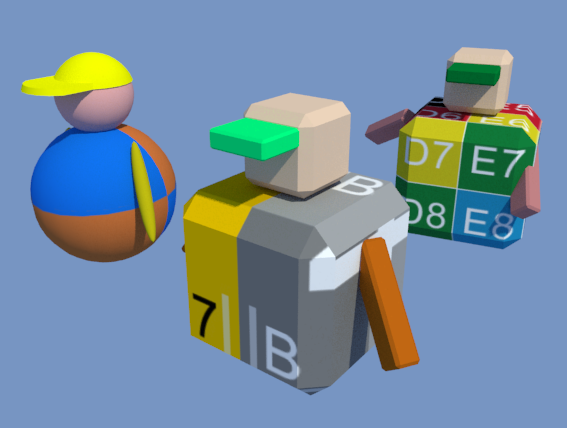
Render!

user_attr_vray_030.png

Once again?

And if we have no limit: user_attr_vray_031.png

user_attr_vray_032.png

If you often do crowds, you should seriously consider this solution.

Notice

I think, as mental ray User Data, it's a bit cumbersome to deal with. But if you or your colleague is scripter, it is not too difficult to put it up on a production.

I breath the poppy it may (this is unconfirmed so take with a grain of salt) Deex (whom I thank for making me discover VRay) integrates a simple way to deal with them in Arsenal (but dont be too hasty :sourit: ).

Conclusion

I hope this tutorial will help you in your productions.

See you!

Dorian

:marioCours:

Les User Attributes de VRay

dimanche 17 février 2013 à 21:36

user_attr_vray_tn.pngVoici un tuto que je voulais faire depuis pas mal de temps. :dentcasse:

VRay propose, depuis un bon moment maintenant, d'utiliser des attributs par objet pour contrôler certaines valeurs. Ça peut aller assez loin mais bien souvent, ce sont les shaders qui en profite. L'idée est d'appliquer un seul et unique shader à un grand nombre d'objet, mais que chaque objet ait des attributs "spéciaux" avec une valeur bien particulière qui se verront appliquer sur les attributs du shader. Si vous vous rappelez bien, je vous avais présenté une feature similaire sous mental ray (Les User Data).

Mais avant même de faire ça, ce tuto va vous expliquer comment exporter puis importer des vrmesh et refaire des assignations de shader à l’intérieur des-dits vrmesh! Bref, un gros programme! :bravo:

Les vrmesh (ou proxy)

C'est quoi?

Pour faire très brièvement: Vous connaissez le principe du tiling des textures? (Non? Hop! Hop! Hop! Et plus vite que ça! :nannan: ) Et bien le principe est le même, mais pour de la géométrie: Les vrmesh sont des mesh "prêt à être raycasté". La géométrie y est stocké dans une grille (voxel).

Ainsi, vous ne chargerez que "la boite" nécessaire au rendu. Votre vrmesh peut faire une taille astronomique, seul les éléments nécessaire au calcul seront chargé/déchargé à la volé. Au même titre que les maps tilé, ceci a pour effet d'augmenter les IO sur vos disques mais vous donne une énorme flexibilité.

N'ayez donc pas peur de la taille, les vrmesh sont fait pour! :D

Pratique

On va faire simple, voici une scène avec deux cycle d'animation de 24 frames:

user_attr_vray_001.png

Ça ne se voit pas mais ces deux bonhommes marchent! :onSeFendLaPoire:

A cette étape, le principe est d'assigner à chaque "groupe de shader", un shader quelconque. C'est le nom qui importe car c'est ce nom là qui sera stocké dans le vrmesh:

user_attr_vray_002.png

"lambert5" ça aurait dû être "bras" mais je suis complètement passé à coté. :baffed:

Même si ce n'est pas obligatoire, essayez de garder une cohérence dans les noms entre tous vos objets. Ainsi, si vous avez des personnages de foule à exporter. Assignez leur à tous les shaders "bras", "corp", "tete", "cheuveux", "tenuHaut", "tenuBas", etc... Avec un peut de script, vous gagnerez du temps plus tard.

Sélectionnez le groupe de mesh que vous souhaitez exporter:

user_attr_vray_003.png

Puis allez dans Create/V-Ray/Create proxy:

user_attr_vray_004.png

Vous arrivez devant une interface horrible sobre:

user_attr_vray_005.png

Cochez Export animation. Si votre mesh est animé et que vous envisagez d'utiliser du motion blur sur votre rendu final, cochez aussi Export velocity. Les deux valeurs vont créer l’intervalle qui permettra de calculer le vecteur de direction à stocker dans les vertex. C'est à partir de ça que VRay calculera le motion blur de la géométrie. Soyez vigilant sur cet intervalle. On peu avoir des (mauvaises) surprises. Si vous ne comptez pas rendre avec du motion blur, décochez cette options, se sera des informations en moins à stocker dans la géométrie.

Dans mon cas j'ai aussi coché Use playback range mais avisez en fonction. :reflechi:

Avec Face in preview, Chaos Group nous gratifie une fois de plus d'une petite feature à priori anodine mais très intéressante en pratique: Le principe est de sauver les index de n face qui seront affiché dans le viewport plus tard.

Quand on fait des proxy, principalement pour alléger sa scène, on se retrouve souvent à devoir gérer des grosses bouding box à la place. Si le pipeline le permet, vous aurez peut être même un proxy fait par un autre département (on ne compte même pas de temps nécessaire). La, les bonhommes de Chaos Group ont eux la réflexion très intéressante: "Pourquoi pas faire un proxy sympa, qui correspond à quelque chose mais vraiment allégé?". Le pari est entièrement réussi, vous verrez ça plus tard. :)

Si vous souhaitez réimporter directement le proxy nouvellement créé, vous pouvez, si vous le voulez cliquer sur Automatically create proxies.

Pour le reste, je vous conseil vivement de regarder la doc.

Une fois que c'est fait, on clique sur Create Proxy!

Faites ça pour tout les personnages que vous avez à exporter.

:longBar:

Pour importer tout ça:

user_attr_vray_006.png

user_attr_vray_007.png

Tadaaaa:

user_attr_vray_008.png

user_attr_vray_009.png

Et voilà nos 100 faces par objet. Ça claque hein? :aupoil:

Plus sérieusement, vous pouvez en mettre des centaines, votre viewport ne bronchera pas. De plus, ces proxys correspondent au modèle final. L'approximation vous gênera beaucoup moins qu'un model low ou pire, une bounding box.

Mais allons zyeuter les options:

user_attr_vray_010.png

Si on coche Bounding box:

user_attr_vray_011.png

Pour les nostalgiques. :trollface:

Si vous n'êtes pas satisfait de l'approximation, Chaos Group a pensé à vous: Show whole mesh:

user_attr_vray_012.png

Les autres options sont plus spécifique. Je ne rentre pas plus dans les détails. Si ça vous intéresse: :RTFM:.

Notez juste que la vitesse de l'animation est configurable (animable aussi! :gniarkgniark: ) et que dans notre cas (et la plupart des cas) elle est cyclique (Loop).

Allez dans les onglets plus à droite. VRay nous a déjà connecté un shader et...

user_attr_vray_013.png

Oh miracle! Nos slots sont là! :laClasse:

Vous n'aurez plus qu'a drag and droper les shaders à utiliser.

Notez qu'à trop vouloir être gentil, VRay nous créé un shader pour chaque vrmesh importé. Sauf que si vous importez deux fois le même vrmesh, vous aurez deux shaders qui font là même chose. N'hésitez pas à en virer un et à appliquer un seul shader par type de vrmesh.

Maintenant passons aux choses sérieuses! :enerve:

Les User Attributes

Sélectionnez le node de transform d'un des vrmesh et ajoutez y des User attributes:

user_attr_vray_014.png

Dans ces User attributes (paumé tout en bas de votre Attribute Editor) ajoutez la chose suivante:

casquetteColor=1,1,0;

user_attr_vray_015.png

Là normalement vous commencez à comprendre. :siffle:

Sur le second, créez une valeur similaire:

user_attr_vray_016.png

Maintenant créez un shader, un blinn dans mon exemple (Oui, je sais, c'est mal). Donnez lui un nom clair (ça va vite devenir le foutoir dans vos connections donc c'est vous qui voyez :redface: ):

user_attr_vray_017.png

Ajoutez un node VRayUserColor et entrez la valeur de votre attribut:

user_attr_vray_018.png

user_attr_vray_019.png

Mettez la couleur par défaut qui vous convient. Ce sera la couleur utilisé si le User Attribute n'est pas présent/valide.

Vous avez des exemples de syntax juste en dessous du node (encore une bonne idée).

Connectez ce node à la color de votre shader (dommage que Maya n'utilise pas la default color dans l'hypershade, ça serait toujours plus sympa qu'un truc tout noir.

user_attr_vray_020.png

Connectez votre shader aux deux VRayMeshMaterial, dans le slot... "casquette":

user_attr_vray_022.png

user_attr_vray_021.png

Puis rendez:

user_attr_vray_023.png

La musique de victoire (à écouter avec :smileFou: )

Faîtes pareil pour tous les shaders (sauf le corp qu'on se garde pour après :jdicajdirien: ):

user_attr_vray_024.png

user_attr_vray_025.png

Bon, voilà pour les couleurs. Vous pouvez faire de même avec les VRayUserScalar et les attributs à virgule.

Maintenant attaquons nous au corp:

user_attr_vray_026.png

Juste un node de file.

Imaginons que vous ayez quatre textures:

La seule variable dans votre texture se situe à la fin (et, pourquoi pas, dans le chemin).

Mettez donc ça dans votre chemin de fichier:

user_attr_vray_027.png

Et appliquez la variable à vos différents User Attributes:

user_attr_vray_028.png

user_attr_vray_029.png

Rendez!

user_attr_vray_030.png

On se la remet?

Et si on s'enflamme un peu: user_attr_vray_031.png

user_attr_vray_032.png

Si vous êtes amené à faire souvent (ou pas) des foules, vous devriez serieusement envisager cette solution.

Petites notes

Mine de rien, et comme les User Data de mental ray, c'est un peu laborieux à mettre en place. Mais si vous ou un collègue savez scripter, il n'est pas trop difficile de mettre ça en place sur une production.

On me souffle à l'oeillette qu'il se peut (c'est non confirmé donc à prendre avec des pincettes) que Deex (que je remercie pour m'avoir fait découvrir VRay) intègre ça à Arsenal. On peut donc espérer un truc simple (mais soyez pas trop pressé :sourit: ).

Conclusion

J’espère que ce tuto assez costaud vous aidera dans vos productions.

A bientot!

Dorian

:marioCours: